Talk to most Graphic Designers about their go to software when starting out and you’re likely to hear Photoshop; that was certainly the case for me. Even though I have been using it for over 20 years, I’m often learning new tips and techniques online or from my fellow design colleagues. I thought I’d share 5 Photoshop tools & techniques you may have missed.
1. Quick white balance tip
When taking photos, you might notice your image looks too blue or too orange. A quick way to fix the white balance in Photoshop is to create a new Levels adjustment layer. On the left hand side there are 3 eyedropper icons. Select the bottom one to set the white point. Within your image select what should be white, then select the top eyedropper and select what should be black. The bottom line, if the result appears a little too intense for the photo you're working on, no problem, just simply drop the opacity of the Levels layer.

2. Control luminescence with Black & White Adjustment Layer
The Black & White Adjustment Layer is most often used to convert an image to black and white. However, you can use it to control the luminescence values of the colors of your image. This is really handy when you want to directly target a single colour tone, without affecting the rest of the image.
To use this technique, create a new Black & White Adjustment Layer. It will convert your image to black & white but don’t panic! Change its blending mode to Luminosity and the original colour will return. By adjusting the sliders you can control the luminescence of the colour tones: Reds, Yellows, Greens, Cyans, Blues and Magentas.

3. Content-Aware Fill and Content-Aware Move Tool
Content-Aware Fill
Content-Aware Fill is a great tool. It is well hidden so you may have missed it! It provides a very good starting point when it comes to removing an object. I say “a good starting point” because it's never perfect and will likely require some manual refining. To do so, select the object you want to remove with the Marquee Tool or Lasso Tools. Then go Edit > Fill and change Contents to Content-Aware.

Content-Aware Move Tool
The Content-Aware Move Tool is used to quickly move an object from one place to another and does a good job at filling in what's left behind and blending into its new position.
Start by selecting the object you want to move. Then select Content-Aware Move Tool from your toolbar (it might be hidden behind the Healing Brush Tool.) Drag your object to where you want it moved to, double-clicking to confirm.

4. History Brush Tool
The History Brush Tool has been around since Photoshop 5 (1998) along with the History window. It’s a tool that I’ve often forgotten about but it is great for fixing those little "oops" moments when you've messed up a quick comp. It lets you source from a previous history state, revealing areas you want to recover. With a workflow of using masks, adjustment layers and smart objects, the History Brush Tool’s function is relatively obsolete but I think it still has its use.
To use the History Brush Tool, you need to have the History window open, then select a state you want to source from. Select the History Brush Tool and use it like the normal Brush Tool to recover the previous history state.
In the image below, it’s handy for tidying up after using the Content-Aware Move Tool.

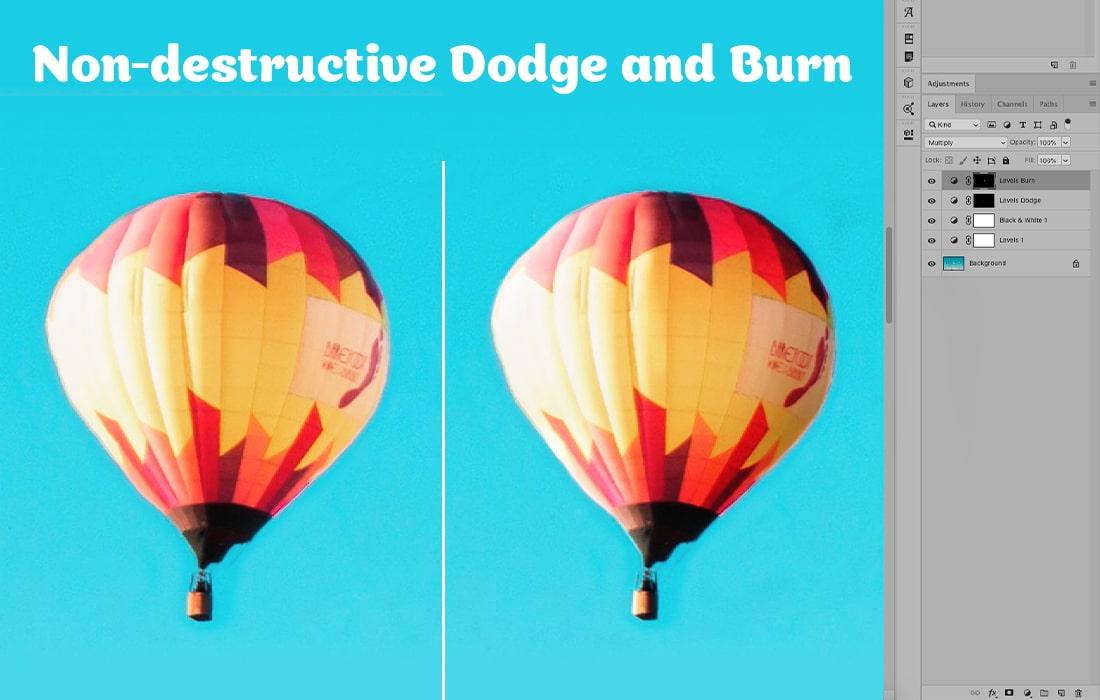
5. Non-destructive Dodge and Burn
Dodge (lighten) and Burn (darken) are great tools for increasing the contrast of specific areas or shifting the light direction of an image. However using these tools comes with a problem - they are destructive (not editable). However, there is a technique that is editable:
Create two new Level Adjustment Layers, set one to Screen (lighten) and the other to Multiply (darken). Set both to around 20% opacity and invert their masks to black. We can now use a white brush on either layer to reveal light and dark to specific areas.