Graphics Interchange Format (GIF) is a file format that supports animation, a hybrid of a still image and video. They are often used in Marketing to grab the users attention and draw them to social posts, webpages or deals.
GIFs are pretty simple to make and can be as complicated as you like! If you have access to Adobe Photoshop and a few minutes spare, you can create an animated GIF in no time.
Here’s an example of what we are going to make:

Step 1: Create a new document.
Open Adobe Photoshop and create a canvas (File > New) with the dimensions 1100x450 pixels.

Step 2: Open up the Timeline window.
To open the Timeline panel, go to the top navigation and choose Window > Timeline. This will let you turn different layers on and off at different time periods, turning your static image into a GIF.
Next, in the Timeline panel, if it's not automatically selected, click "Create Frame Animation" from the dropdown menu.
 Your Timeline should look something like this:

Step 3: Creating some content
In the GIF we are making the text is animated. You don’t have to create an exact copy of what we have, just make sure your text layer is separate to the background layer. Now, you’re ready to animate!

Step 4: Animating your text layer.
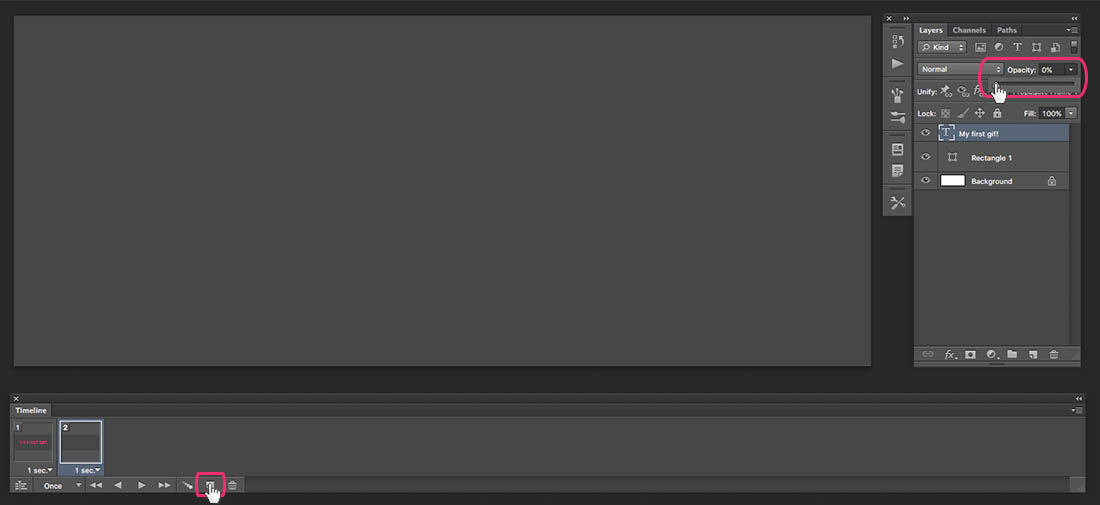
In your Timeline panel there are numbered boxes, these are frames. Frames animate the static image. You already have your first frame set up. It will be displayed for 1 second (you can change this by clicking on the time displayed on the frame).
To create a second frame, click the ‘Duplicate Selected Frames’ button at the bottom of the Timeline panel. To animate the text, go over to your layers panel (making sure you have the text layer selected) turn the opacity down to 0%. As you can see the text disappears. You’re done! Now all you need to do is save it out.
Step 5: Saving your GIF out.
Go to File > Save for Web. Next, choose the type of GIF file you'd like to save under the preset dropdown. Our image has a lot of solid colors, so we are opting for ‘GIF 128 No Dither’.
The number next to the GIF file determines how large (and how precise) the GIF colors will be compared to the original JPEGs or PNGs. According to Adobe, a higher dithering percentage translates to the appearance of more colours and detail - but increases file size. We don’t have many colours so 128 is fine.
Click ‘Save’ at the bottom of the window to save the file to your computer.

I have illustrated a very simple example of what can be done with the Timeline functionality. Many different effects can be carried out to create impressive looking animations.
Here are some examples of more complicated GIFs that I have made in the past:


